Blackstone Leveling Feet Guide
Thank you for purchasing our leveling feet for the Blackstone 17″ and 22″ adventure-ready griddles. Please follow the instructions below for proper assembly and use.
Version Changes
Since we started manufacturing this product, some changes have been made to the design after helpful feedback from Griddlers such as yourself. Because of this, assembly instructions will slightly differ based on your version but functionality will remain the same.
Two Ways To Install!
IMPORTANT: It has come to our attention that the 17″ Griddle is now using longer thinner rubber feet than original, and the new 22″ Griddle with stainless front cover is using those rubber feet too. The original 22″ Griddle with black front cover will still accept the “Slide-On” installation method below, but for the other two you may want to try the “Bolt-On” installation method if our leveling feet are not fitting properly.
There are two ways to install our leveling feet to your griddle. There is the slide-on method (default), and the bolt-on method. Each have pros and cons:
Slide-On: Quickest and easiest installation. You slide these over the existing rubber feet on the bottom of your griddle, and screw into the rubber to keep them from spinning when you turn the levelers. In this method depending on the manufacturing tolerances of the rubber feet included with your griddle, our leveling feet MIGHT feel “loose” or “unstable” however once the griddle is down on a flat surface with the weight on them, they will be sturdy and function great.
Bolt-On: Longer installation time, requires purchase of extra bolts (we will be including these in the future), but a more permanent and sturdier solution. In this method you will remove the existing rubber feet from your griddle and then bolt on our leveling feet directly to the chassis. Aside from the increased installation labor and cost, the only other “con” to this method is that the plastic leveling feet make direct contact with the griddle and although we use heat-resistant plastic, if the griddle is on the hottest setting and it’s left on for an extended period of time, the leveling feet MIGHT soften or melt (did not happen in our testing, but there are many external variables, please contact us at main@dunbartechnology.com if you encounter this issue).
Assembly Instructions: Slide-On Method
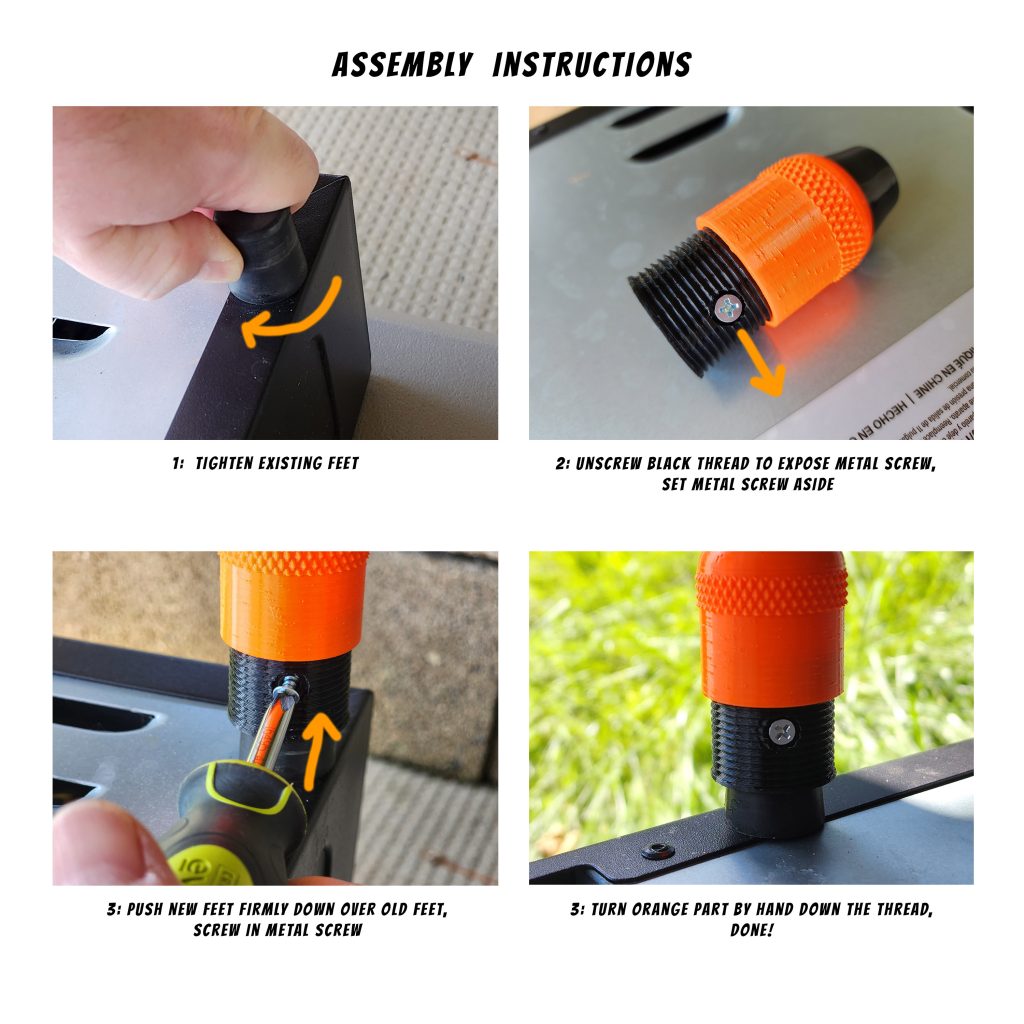
NOTE: If it seems the feet are not fitting over the existing rubber feet and you can’t push them down, you can try coating them with a small amount of Avocado oil. If they are still not fitting, please contact us via e-mail (main@dunbartechnology.com).
Step 1 – Unscrew the new parts.
First begin by unscrewing the threaded inner sleeve (black) from the outer foot (orange). Do this for all 4 feet. Twist them counter clockwise to unscrew. Be careful to not lose the screws that are inserted into each foot during shipping!
Step 2 – Griddle upside down.
While it is OFF and UNPLUGGED, turn your Blackstone griddle upside down and lay on a flat, sturdy surface. We recommend removing the actual steel griddle part (pan) first (it slides and lifts off). You will also want to make sure your existing feet are tight, turn them by hand clockwise.
Step 3 – Insert new part onto rubber feet.
Take the four threaded inner sleeves and insert them onto the rubber feet of your griddle. These are designed to be a very tight friction-fit, so you may have to apply significant pressure or wiggle them on a bit. Push them on as far as they will go. The orientation of the holes on them DO NOT matter. It’s OK if they do not go on “all the way” but try to get them on as much as possible. NOTE: If it seems the feet are not fitting over the existing rubber feet and you can’t push them down, you can try coating them with a small amount of Avocado oil. If they are still not fitting, please contact us.
Step 4 – Screw on.
Use the included screws to screw the black threaded inner sleeve onto your rubber feet. This will prevent the part from twisting when you are leveling the griddle.
The orientation and location of the screws do not matter, however you need to apply significant pressure and keep the screws straight while you are screwing them into the rubber. You will do this for all 4 feet, a total of 4 screws.
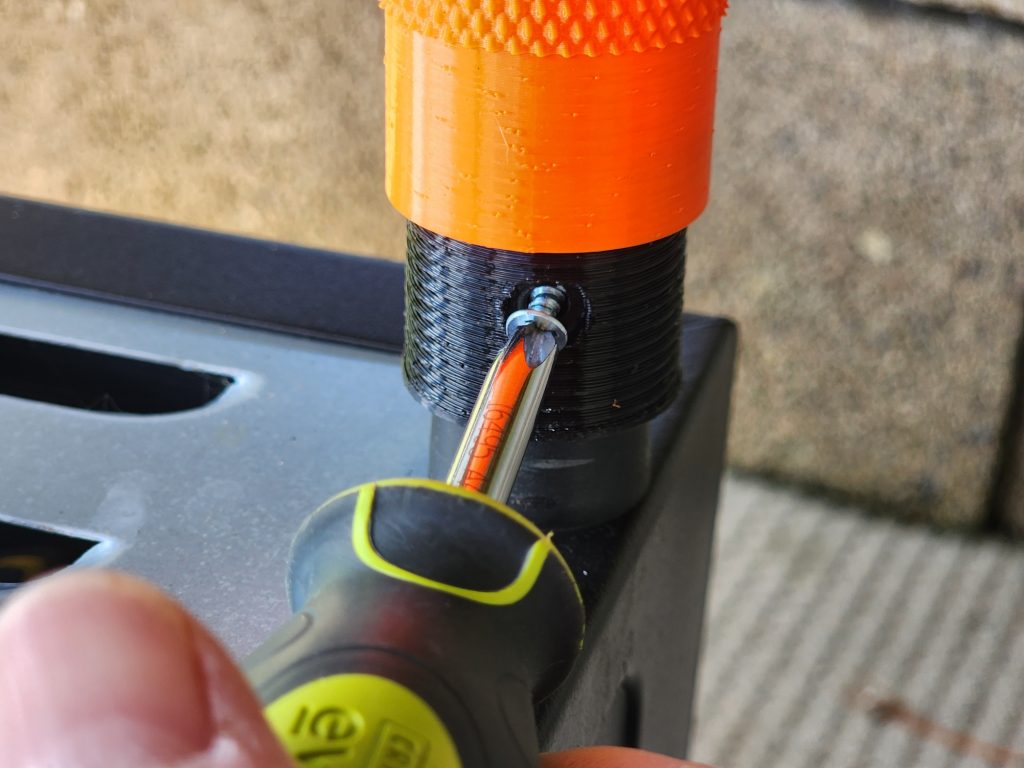
Step 5 – Thread orange outer feet on.
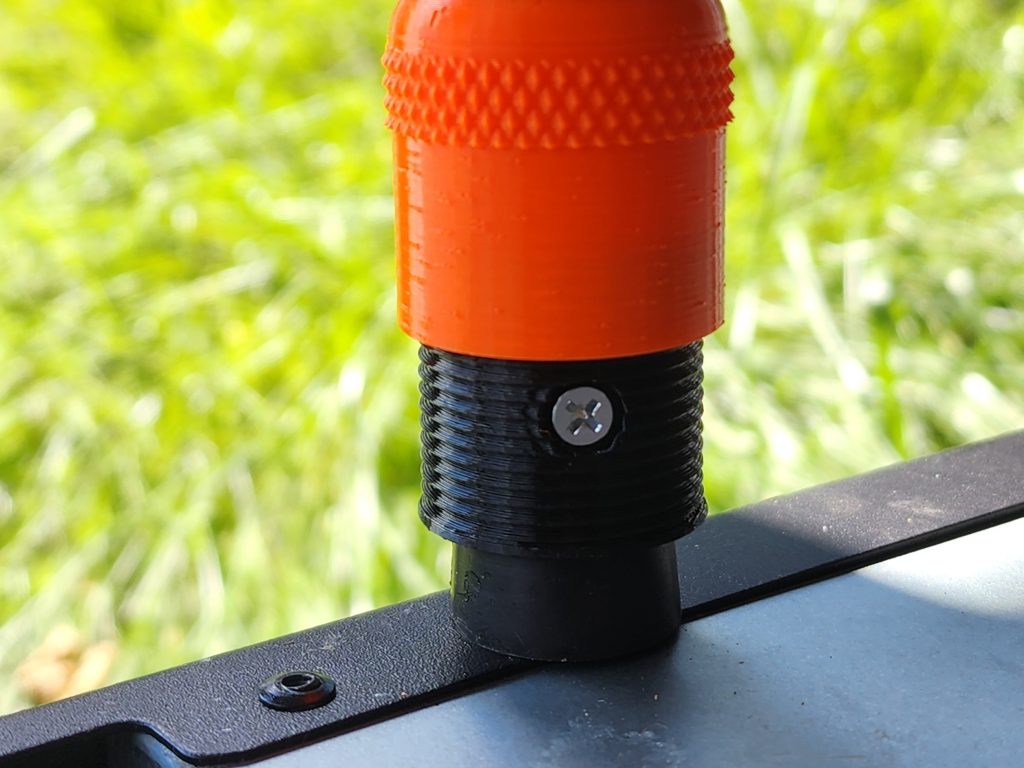
Now simply thread on the four orange feet by screwing them clockwise onto the black threaded inner sleeves. Screw them on all the way, but don’t over-tighten. You are now done installing and can flip your griddle back over and install the griddle pan back on.
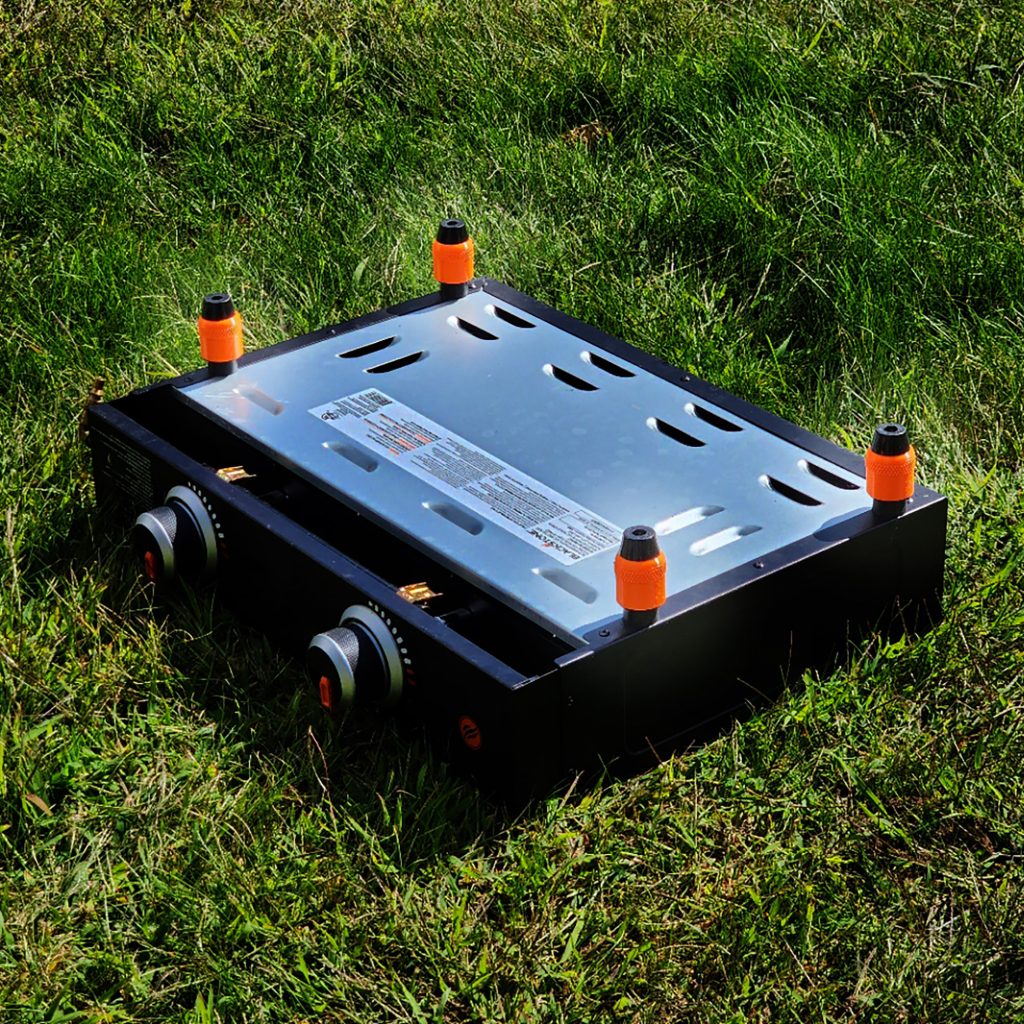
Assembly Instructions: Bolt-On Method
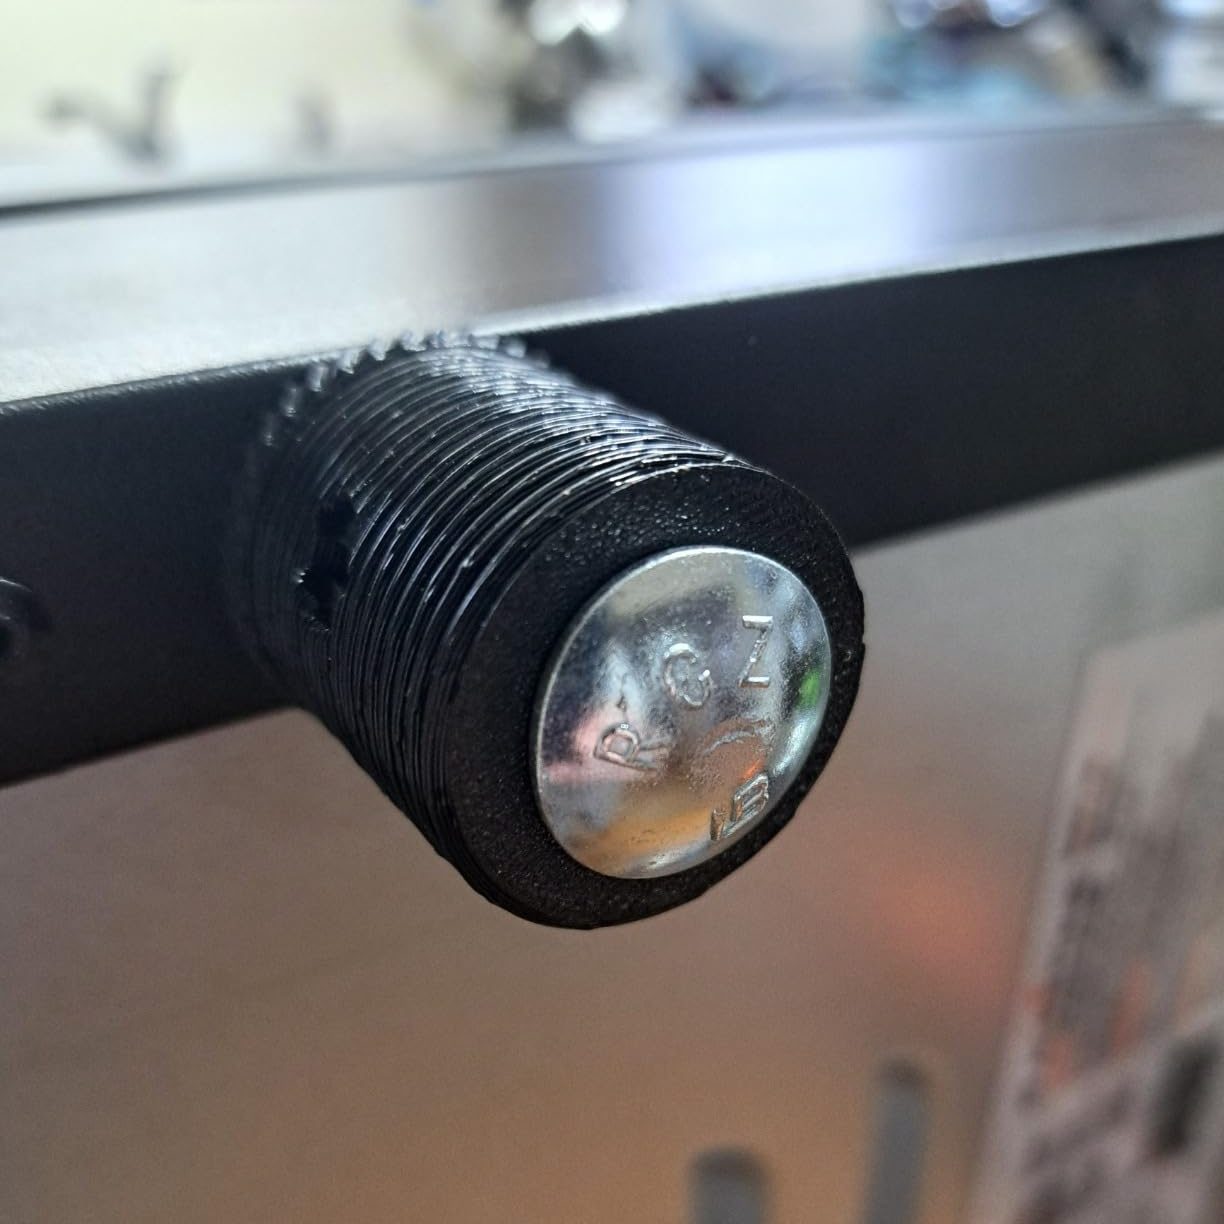
You can bolt them on directly to the chassis, replacing the default rubber feet that come with the griddle. This (currently) requires an additional purchase of four 3/8 x 2″ carriage bolts (and nuts) from your local hardware store, these should be less than $4 total at most places. In the future we will be including these with the product.
Step 1 – Remove existing rubber feet from griddle.
You need to take the top griddle pan off the griddle to access the inside, and remove the 4 nuts holding the 4 rubber feet on.
Step 2 – Use carriage bolts to secure inner black threaded part to griddle.
Remove small screws from included parts and set aside.
Insert the 3/8 x 2″ carriage bolts you supplied in from the bottom of the inner black threaded part and up through the holes in the chassis, use nuts to secure. Make sure they are very snug but don’t over tighten (plastic may crack with excessive force). You can additionally use lock washers to help ensure a stable fit.
Step 3 – Screw-on outer orange threaded part.
Screw on the outer orange part. Done!
Usage Instructions – How To Level
How to use is pretty simple. ALWAYS ONLY LEVEL THEM WHEN THE GRIDDLE IS COLD AND TURNED OFF, WHEN YOU ARE FIRST SETTING IT UP ON A NEW SURFACE, DO NOT REACH UNDER GRIDDLE IF IT IS ON AND HOT!
Step 1 – Check level.
Check your griddle level using either an omnidirectional (circle) bubble level, or by putting a little bit of water or oil in the center of it and seeing which way the liquid runs. So for example, if the liquid runs to the back left corner, you need to raise the back left foot. If the liquid runs straight to the right, you need to raise the two right feet, etc.
Step 2 – Raise feet to level.
Whichever feet you need to raise, you simply lift up on that corner of the griddle a little bit and then unscrew the orange part of the foot to raise that corner of the griddle by turning the orange foot counter-clockwise.
Repeat this as much as necessary to get the griddle nice and level! If your griddle is on an extremely uneven surface or slope, you may still need need to use a rock or brick under one or more corners of the griddle. These leveling feet are designed to fine-tune the leveling and you should always try to get your griddle on the most flat and level surface to begin with.
